本文共 3601 字,大约阅读时间需要 12 分钟。
OpenGL简介 (Introduction to OpenGL)
Probably most of you have played tons of video games on the computer and probably loved them too, ever wonder how they can be made? Well, there is a lot of Graphics library which provides APIs for the same and in this Article, we will talk about a similar library OpenGL which is an abbreviation for Open Graphics Library, it is a cross-language, cross-platform API which is used for things like 2D and 3D vector Graphics. Its API generally used to interact with a Graphics processing unit that results in hardware-accelerated rendering.
你们中的大多数人可能在计算机上玩过很多视频游戏,并且可能也喜欢它们,是否想过如何制作? 好的,有很多提供相同功能的API的图形库,在本文中,我们将讨论一个类似的库OpenGL ,它是Open Graphics Library的缩写,它是一种跨语言,跨平台的API,用于2D和3D矢量图形。 它的API通常用于与图形处理单元进行交互,从而导致硬件加速渲染。
Problem with OpenGL is creating OpenGL context is a little tough thing because the process varies between operating systems, but creating an automatic OpenGL context has become a very common feature in several game-development and user-interface libraries. There is a library which is only meant to produce an OpenGL-capable window and that is OpenGL Utility Toolkit (GLUT) though it was discontinued around 1998-99 this project is superseded by freeglut. And we will talk about freeglut in our OpenGL programs.
OpenGL的问题是创建OpenGL上下文有点困难,因为该过程在不同的操作系统之间有所不同,但是创建自动OpenGL上下文已成为一些游戏开发和用户界面库中非常普遍的功能。 有一个仅用于生成支持OpenGL的窗口的库,即OpenGL Utility Toolkit(GLUT),尽管该库在1998-99年左右已停产,但此项目已由freeglut取代。 我们将在OpenGL程序中讨论freeglut 。
Ubuntu中的OpenGL安装指南 (OpenGL Installation Guide in Ubuntu)
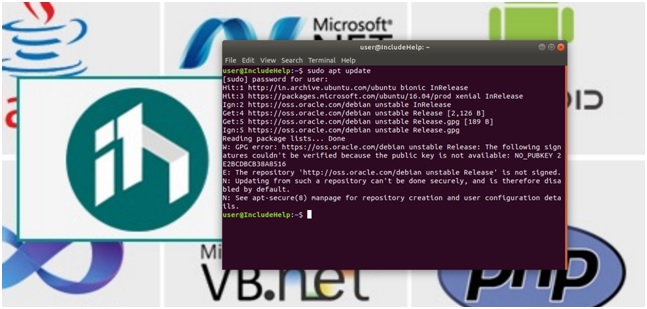
Step 1: To create OpenGL development environment we need to get some necessary libraries including freeglut so, Open Terminal and enter the following commands:
第1步:要创建OpenGL开发环境,我们需要获取一些必需的库,包括freeglut,因此请打开Open Terminal并输入以下命令:
sudo apt update
sudo apt install freeglut3-dev
sudo apt install binutils-gold g++ cmakelibglew-dev g++ mesa-common-dev build-essential libglew1.5-dev libglm-dev
sudo apt install binutils-gold g ++ cmakelibglew-dev g ++ mesa-common-dev build-essential libglew1.5-dev libglm-dev
sudo apt install mesa-utils
Step 2: If the step 1 successfully done then you can run the OpenGL programs. Download the following OpenGL program.
步骤2:如果步骤1成功完成,则可以运行OpenGL程序。 下载以下OpenGL程序。
Copy it from here:
从这里复制:
#include#include int x, y;float r,g,b;void idle(){ x = rand()%640; y = rand()%480; r=(float)((rand() % 9))/8; g=(float)((rand() % 9))/8; b=(float)((rand() % 9))/8; glutPostRedisplay();}void magic_dots(void){ glMatrixMode(GL_PROJECTION); glLoadIdentity(); gluOrtho2D(0.0, 640.0, 0.0, 480.0); glColor3f(r,g,b); glBegin(GL_POINTS); glVertex2i (x,y); glEnd(); glFlush(); }int main(int argc,char** argv){ glutInit(&argc,argv); glutInitDisplayMode(GLUT_SINGLE); glutInitWindowSize(640, 480); glutCreateWindow("Randomly generated points"); glClearColor(0,0,0,0); glClear(GL_COLOR_BUFFER_BIT); glutDisplayFunc(magic_dots); glutIdleFunc(idle); glutMainLoop(); return 0;}
Note: The above program is not explained here, in this article, as it is out of the scope of this article.
注意:本文不在此处解释上述程序,因为它不在本文讨论范围之内。
Step 3: Open terminal in the directory where you have that program and enter the following commands:
步骤3:在拥有该程序的目录中打开终端,然后输入以下命令:
g++ Random_Point.cpp -lGL -GLU -glut -lGLEW -o RP./RP
This is the step we simply compiler the programs also we link the OpenGL libraries with it.
这是我们只编译程序的步骤,我们也将OpenGL库与其链接。
After step 3, your program will run and you can see an OpenGL graphics’ random points generation.
在第3步之后,您的程序将运行,并且您可以看到OpenGL图形的随机点生成。
You can find something following:
您可以找到以下内容:
翻译自:
转载地址:http://zsvzd.baihongyu.com/